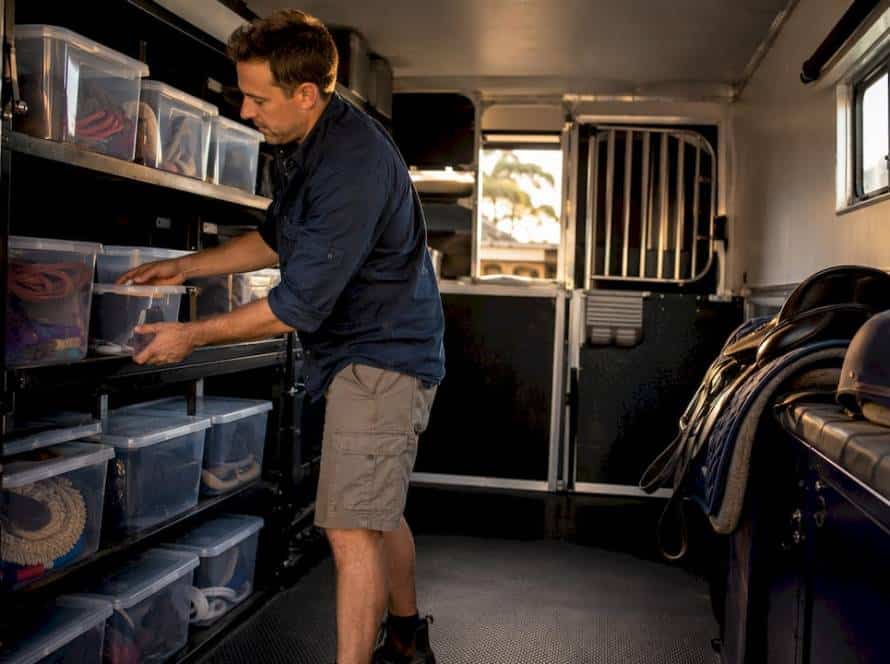
A butt bar, often called a bum bar, is the padded bar or rod that closes across the back of a straight-load stall, just behind your horse’s hindquarters. It stops the horse stepping or sliding backwards, and it gives a bracing horse something to lean on other than the rear door. A good one is the right height, latches positively, releases in a hurry and is fixed to something strong. A poor one is a hazard in its own right.
This guide covers what a butt bar is for, how to use it when loading and unloading, what to check on the bar and its attachment, how it compares with a chain or rear gate, and what to think about before adding one to an older float. It is written for Australian owners who want a float that is safe for the horse and straightforward for the handler.
What a butt bar does on a horse float
In a straight-load float each horse stands facing forward in its own stall. Behind the horse there is a gap between its rump and the rear door or ramp. The butt bar fills that gap. Extension guidance from the University of Maryland says a straight-load trailer should have a butt bar or gate that closes behind the horse’s rear end, so a horse bracing backwards leans on it instead of the trailer door.
That covers three jobs:
- Support in transit. Horses brace against braking and cornering. The bar gives the hindquarters a stop, which keeps the horse centred in its stall.
- Containment. Extension safety material notes that butt bars help contain a horse if the rear door opens by accident during transit.
- A controlled moment at the back. While the ramp or door is open, the bar stands between the horse and an unplanned reverse exit.
It is a safety device, not a restraint to make up for an untrained horse. More on that below.
Butt bar, bum bar, breeching bar or chain: what is the difference?
Australian owners use all of these words, and they overlap.
| Term | What people usually mean | Typical strengths | Typical drawbacks |
|---|---|---|---|
| Butt bar or bum bar | A rigid, usually padded bar across the rear of the stall | Solid, visible to the horse, spreads load | Needs correct height and secure mounts |
| Breeching bar or breeching strap | A bar or strap mounted at rump height, sometimes on the divider | Can be fixed or swing-away | Fit depends on the horse and float layout |
| Chain | A chain hooked across the back | Cheap, light, easy to add | Flexible, so a panicking horse can go under it |
| Rear gate or breach door | A door or full-width gate inside the ramp | Closes the whole opening | Adds weight, and the horse can be trapped against it if it falls |
Older floats often have only a bum bar or a chain across the rear, and you will see plenty of owners on forums asking how to add one to a two-horse straight-load that has a chain on one side but nowhere to hook the other end. The question is common because the fixing points matter as much as the bar.
Bars versus chains: which is safer?
The weight of experience favours a solid bar. One Australian horse trainer writes that solid metal butt bars are generally safer than chains, because horses that panic and try to leave in a hurry are more likely to go under a chain. That is an experienced practitioner’s view, not a regulation, but it matches the physical problem: a chain has no rigidity at the height where you need it.
There is a dissenting view, and it is worth knowing. Some experienced horsemen argue that butt bars, chains and rear breach doors can be unnecessary and even dangerous if a horse ends up trapped underneath or falls over them, and they push training as the real answer. The same source stresses that a bar is not a substitute for training: a horse should be able to walk on, stand quietly and walk off without being held in by hardware.
The practical reading of both views:
- If you have a bar or chain, it should be the correct height and release quickly.
- If you are choosing between a bar and a chain, a rigid bar with a quick-release is the stronger option.
- Neither replaces a horse that loads calmly and has been prepared for movement, noise and pressure behind it.
A horse should be confident about loading and standing in the float before the butt bar is permanently closed behind it. Practise with the bar open, then close it for short stands, then short drives.
Height, position and padding: getting the fit right
Fit is where most butt bar problems start. Too low and the bar does little. Too high and it becomes a way under.
An Australian horse behaviour resource warns that butt bars set too high can let a horse rush underneath and scalp its back. So a bar should sit across the rump, roughly level with or just above the point of the buttock for the horses you carry, rather than up at the top of the tail or the back.
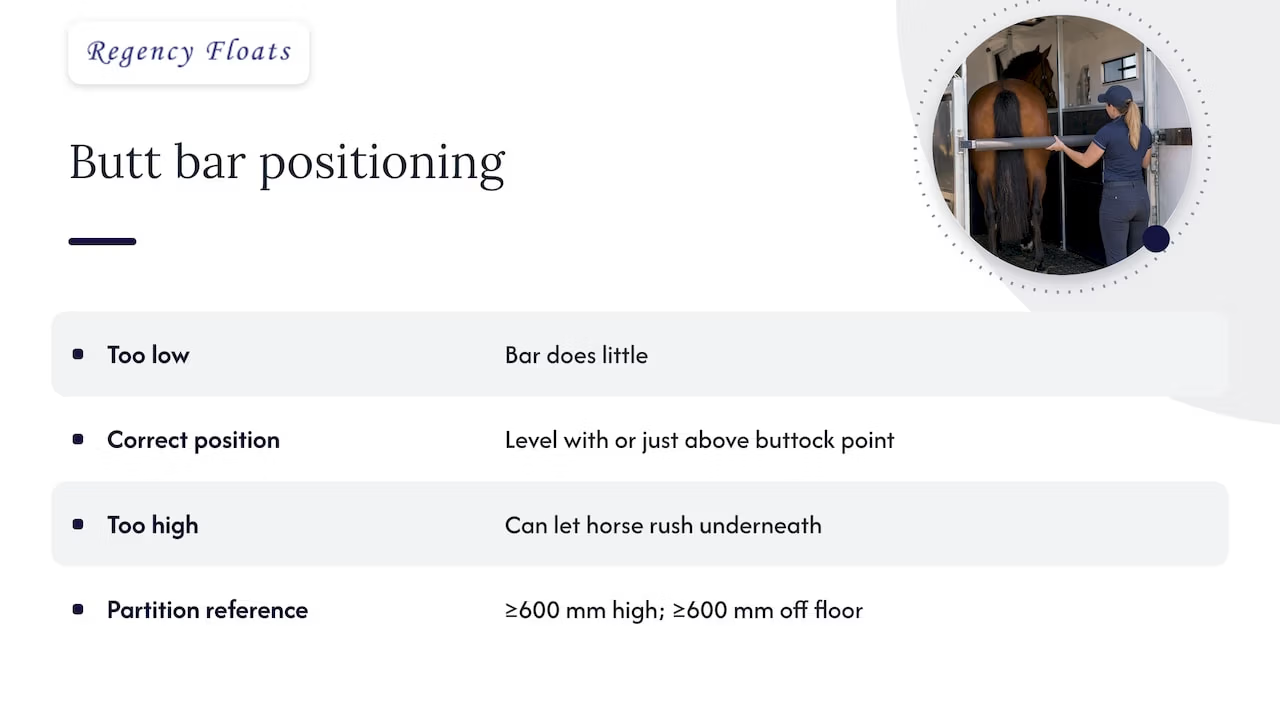
There is also a rule worth knowing in Victoria. Agriculture Victoria states that partitions in horse floats should be at least 600 mm high and placed at least 600 mm off the floor. That figure applies to partitions rather than to butt bars as such, and I have not found an Australian standard that dictates butt bar dimensions. Treat it as a useful reference point for how your divider and rear bar relate, and check your own state or territory’s animal welfare guidance.
Adjustability
If you carry horses of different sizes, an adjustable bar or a bar with several mounting positions is more useful than a fixed one. Check that the adjustment locks firmly, with no slop once pinned. A bar that creeps down or rattles loose in transit is worse than no adjustment at all.
Padding and edges
Padding spreads load across the horse’s quarters and protects the tail and hips. Look for firm, closed-cell foam or rubber that is not torn, and a bar with no exposed bolt ends or sharp welds.
Attachment points, latches and release
A bar is only as good as its mounts. Walk around your float and check these:
- Mounts into the structure. Bolts should go through the frame or a reinforced plate, not just through thin skin or lining. If the wall flexes when you push on the bar, the mount is not good enough.
- Positive latching. The latch should close firmly and stay closed against vibration. You should be able to see and feel that it has engaged.
- Quick release. You need to be able to open it fast, under load, with one hand. Hoofbeats Magazine’s Australian guide to selecting a float says to check that the chest bar is adjustable in height, has a quick-release catch and can be removed in an emergency. The same logic applies at the rear.
- A firm divider. If there is a centre divider, it must be fixed firmly and should not sway, rock or rattle, and a rear breach door that locks onto it can help hold it steady. A butt bar that mounts to a wobbly divider inherits the wobble.
- Recessed hardware. The same guide recommends recessed door handles so a headstall or lead rope cannot snag on protruding fittings. Look at the bar’s latch the same way: nothing should catch a halter or rope.
If you want to see how rear bars, head dividers and tie points work together, our horse float dividers buyer’s guide covers divider types, materials and measuring, and our page on head dividers covers the front end of the stall.
How to use a butt bar safely when loading and unloading
Most injuries around butt bars happen to the handler, not the horse, and they happen in the first and last thirty seconds of the trip.
Loading
- Walk the horse straight on and let it settle. Do not rush the bar closed on a horse still moving.
- Close and latch the butt bar first. A Rutgers fact sheet says the butt bar or chain should be secured before you tie the horse’s head. Tying first risks a broken halter or a fall if the horse pulls back while the rear is still open.
- Then tie the head, using a point and a method that can release. Our guide to safe tie points inside a float explains what to look for.
- Check the bar again by hand before you close the ramp or rear door. Horse & Rider describes the bar as an added safety device attached after the horse is inside, as part of the loading routine.
Unloading
- Open the rear door or ramp fully and make sure it is stable.
- Untie the head first or at least have it ready to release, so the horse is not held while the bar comes down. Follow the sequence your trainer or float maker recommends for your layout.
- Release the bar from the side. The Rutgers guidance says to avoid standing directly behind the horse when hooking or unhooking a butt bar, in case it rushes backwards.
- Let the horse step back calmly with your hand on its quarters or a helper at the head, as it was trained to do.
If your float has a side-access or front-unload door, using it for a nervous horse can avoid the back of the float altogether.
Can you add butt bars to an existing straight-load float?
Often, yes, but it is not a bolt-on job to do casually. Owners ask this regularly, usually about an older two-horse straight load that has a chain on one side with nowhere to hook it. I could not find an Australian standard or official guidance that sets out how to retrofit a bar, so the checks below are practical common sense rather than a regulation. If you are unsure, have a float builder or a qualified fabricator inspect the float.
Before you modify anything, check:
- What the structure is made of. A bar needs a strong mounting point such as a steel upright or reinforced plate. Fibreglass, thin aluminium skin or timber lining on its own will not hold up to a horse leaning on it.
- Where the horse’s rump actually sits. Load the horse (or measure the stall and the horse) and see where the quarters finish. A bar fitted for the wrong position will either sit too far back to help or press on the horse.
- Whether the divider is sound. A bar tied to a loose divider is a bad plan. Fix the divider first.
- Whether the bar will clear the ramp or door. It must latch and release without fouling the ramp springs, the rear door hinges or the lock.
- Whether the release is reachable. You must be able to unlatch it from the side without getting behind the horse.
- Whether the modification affects other compliance. Altering structural parts of a registered trailer can matter for roadworthiness and insurance. Check with your state road authority and your insurer before you cut or weld.
If you carry horses of different sizes, ask for an adjustable bar. If your float is too old or worn to take new mounts safely, replacing the float or a stall section is usually the sounder path.
For measuring and fitting work in general, the supply and fit versus DIY section of our dividers guide sets out what affects cost and lead time.
When a longer rear bar or divider modification makes sense
Owners who usually carry one horse often modify a two-horse straight load. The idea is to use the empty side as extra room, sometimes with a longer rear bar fixed to a divider so the horse stands slightly diagonal or with more space. This is a popular move among single-horse owners, and builders sometimes fabricate a longer rear bum bar for exactly this.
It can be appropriate when:
- You nearly always carry a single horse and the extra space helps it balance.
- The horse is large and cramped by a standard stall.
- The horse stretches its head and neck better with more room. Mel Fleming says room to stretch the head and neck matters for balance and respiratory health, and that some traditional divider and butt bar layouts can restrict it.
It is a poor idea when you sometimes carry two horses and the modification cannot be reversed, when the longer bar leaves a gap a horse could get under, or when the new geometry changes where weight sits on the float. Because it alters how the float handles a load, speak with the builder before you commit.
Rules and standards in Australia
There is no single national rule that I could find that sets butt bar specifications. What exists is a mix of animal welfare guidance and road rules:
- Animal welfare. Agriculture Victoria says horses should travel in a natural position with adequate headroom and enough space between horses for air circulation, which limits stress. The partition height figure above comes from the same page. Check the equivalent guidance in your state or territory.
- Workplace safety. WorkSafe Victoria’s guidebook says transport must be designed so people can enter and exit safely without hazardous manual handling, and that any mechanical ramp should have failsafe features. It also stresses regular vehicle maintenance and spotting hazards such as slippery ramps. This matters if you employ people or run a business.
- Road law. The Western Australian horse welfare standards say vehicles carrying horses must comply with road traffic laws, covering towing limits, towbar and safety chain attachments, braking systems and speed limits.
Before every trip, the towing basics matter as much as the bar. Without a Hitch says the float, tow bar and couplings must be correctly mounted and rated, and that tyres, bearings, brakes and wiring should be checked before loading.
A pre-trip butt bar checklist
Run through this each time you load:
- Padding intact, no cracks or exposed metal.
- Bar height suits this horse: across the rump, not high enough to duck under.
- Mounts tight, with no movement when you push.
- Latch engages with a clear click and the release works one-handed.
- Divider firm: no sway, rock or rattle.
- No hardware where a halter or lead rope could snag.
- Bar closed before the head is tied; head untied before the bar is opened.
- You are standing to the side, not directly behind, when you hook or unhook.
Choosing a float with the right rear setup from the start
If your current float needs more than a latch and a new pad, it may be cheaper and safer to buy the right layout than to keep modifying one. Regency Floats has built horse floats in Australia for over 40 years, and our floats are designed around safety technology, European-style design and a ten-year warranty on the flooring system. We offer new and pre-owned floats and let you customise colours and fittings.
If you carry one or two horses straight load, start with our 2 horse float range or the straight load range. If you want to compare layouts and sizes, see our full float range. Tell us which horses you carry, how often and how big they are, and we can talk through the rear bar, divider and interior setup that suits them. Our interior design guide is a good place to prepare questions.

Prices are not published on our range pages, so ask us for a quote on the model and options you want.
Frequently asked questions
What is the difference between a butt bar and a bum bar?
Nothing in practice. Both names describe the bar across the rear of a straight-load stall behind the horse’s hindquarters. “Butt bar” is more common in American sources and “bum bar” is common in Australian conversation. Some people also say breeching bar, which can mean a bar mounted slightly differently.
Should I close the butt bar before or after tying the horse?
Close and latch it first, then tie the head. Rutgers guidance warns that tying first risks a broken halter or a fall if the horse pulls back with the rear still open. When unloading, release the head before you open the bar, and stand to the side while you do it.
Is a chain as good as a butt bar?
A solid bar is generally considered safer, because a panicking horse is more likely to go under a chain. Some experienced horsemen argue that neither should be relied on and that training is the real safeguard. If your float has a chain, make sure it sits at the right height and can be released quickly.
Can I fit a butt bar to an older two-horse straight load?
Often, if the float has a strong structure to mount to and a sound divider. Check mounting strength, bar height against your horse, clearance for the ramp or door, and whether the change affects roadworthiness or insurance. Have a float builder or fabricator inspect it before drilling or welding.
How high should a butt bar sit?
Across the horse’s rump, low enough that the horse cannot rush under it. A bar that is too high can let a horse go underneath and scalp its back. Because horses differ in size, an adjustable bar is usually the practical choice if you carry more than one horse.